
Now it’s time to turn up the heat, because in this part we’ll make the project work and your dashboard will be displayed in your web browser.
Module installation
Install the Discord-Dashboard module via NPM or another node package manager (e.g. yarn). We will use yarn (and show you how to install it).
npm i yarn --globalSo now that we have the yarn, let’s move on to instantiating the discord-dashboard.
yarn add discord-dashboard
Theme installation
Themes??? What are they??22??2
Yes, themes. This is something that makes our project unique – it is fully customizable and everyone can contribute to our project by creating their own theme and integrating it with the Discord-Dashboard system. Currently, we have 1 theme available, Soft UI!
Regarding Soft UI Look how beautiful it is!
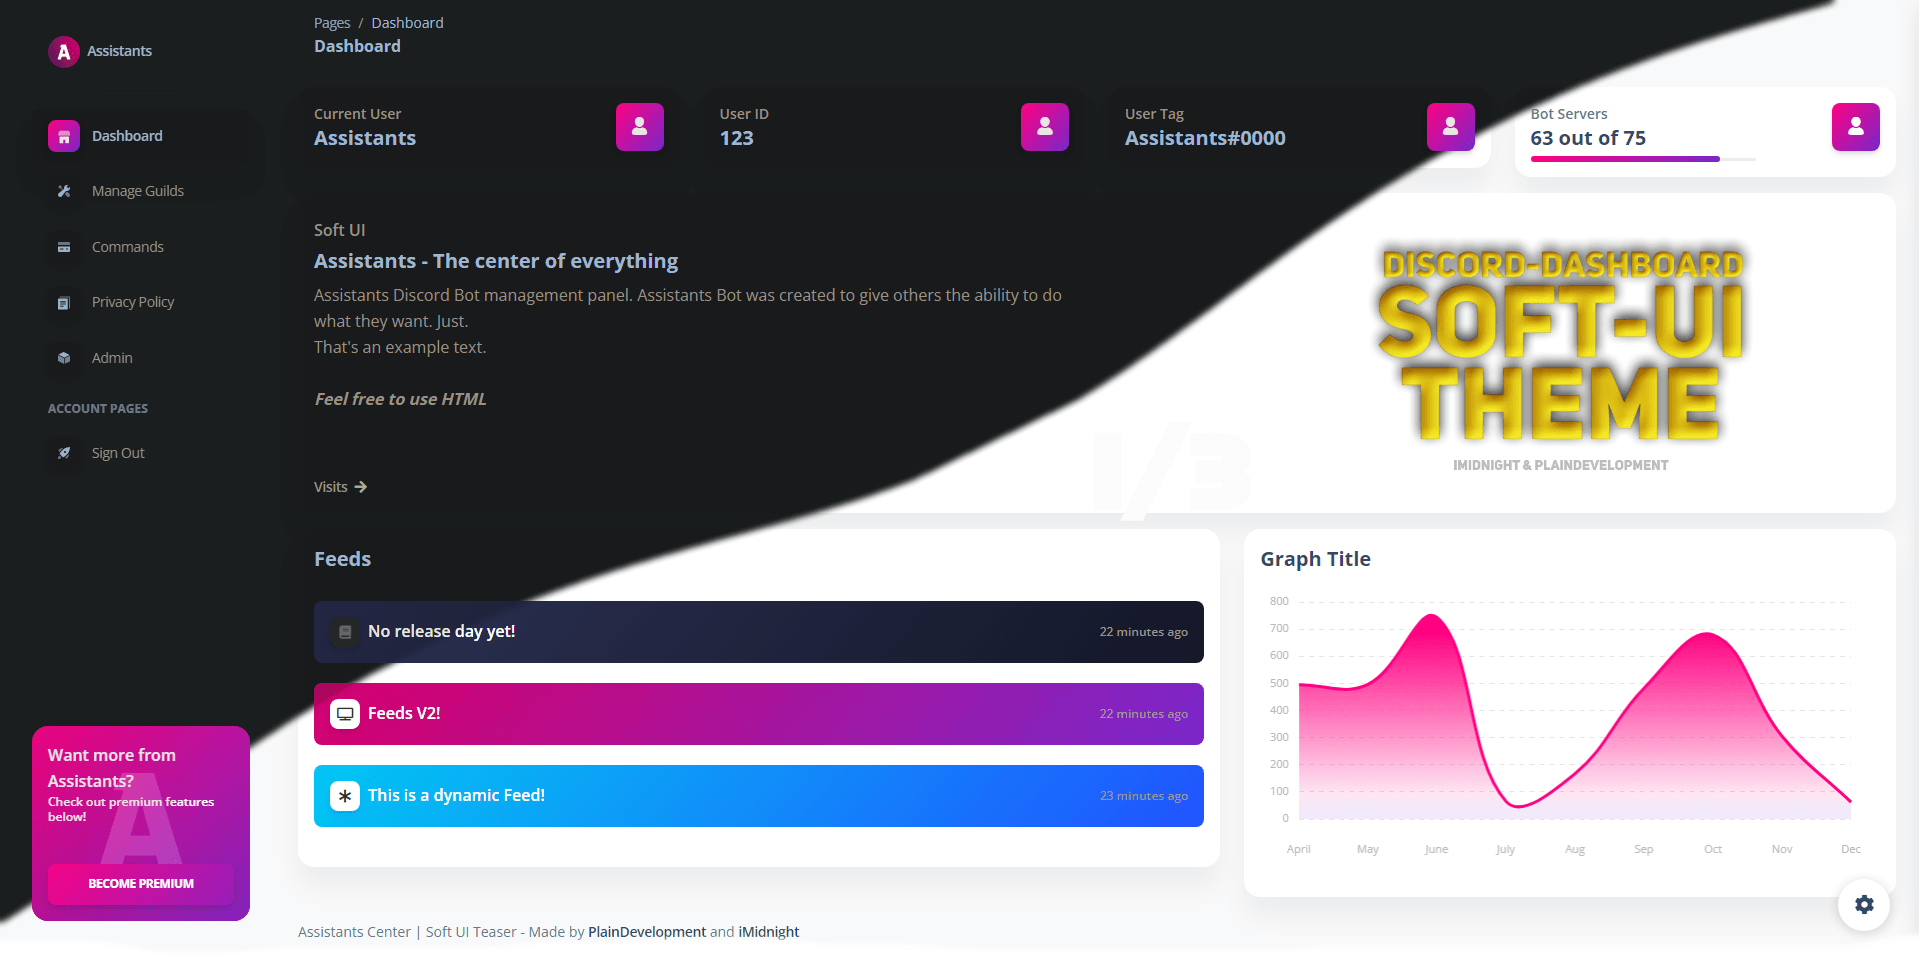
On image: Soft-UI, supporting both dark and light versions, multi languages and much more! Release SOON TM.yarn add dbd-soft-uiDiscord.js installation
Dashboard requires Discord.js, so you need to install it too!
yarn add discord.jsObtaining a licence
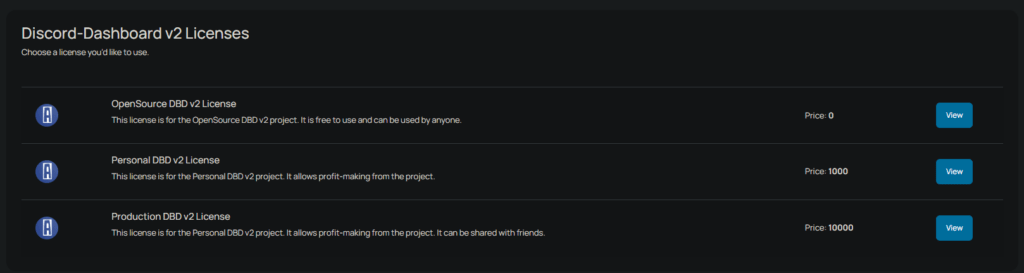
We require a licence to use the discord-dashboard. However, it is not a complicated process and a free OpenSource license is available.
To get a free licence, create an Assistants Center Online Services Account (you can use your Discord account for this).
Then, head to the Assistants Center Discord-Dashboard Licenses page and select the right one for you according to our requirements.
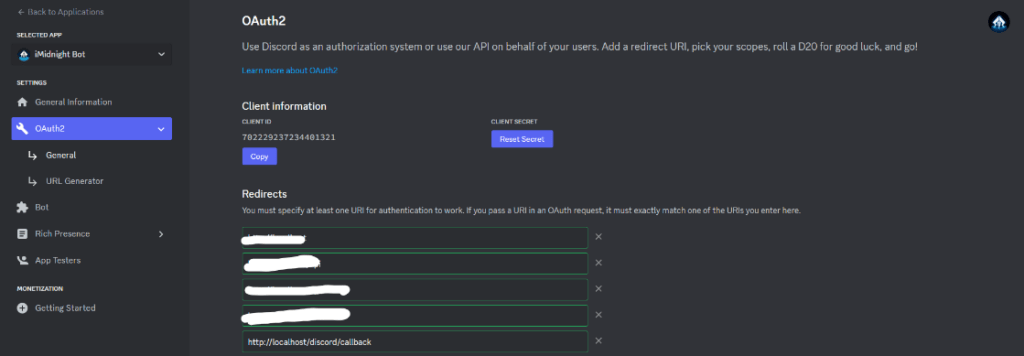
Redirect URI, Bot Token, Client ID & Secret
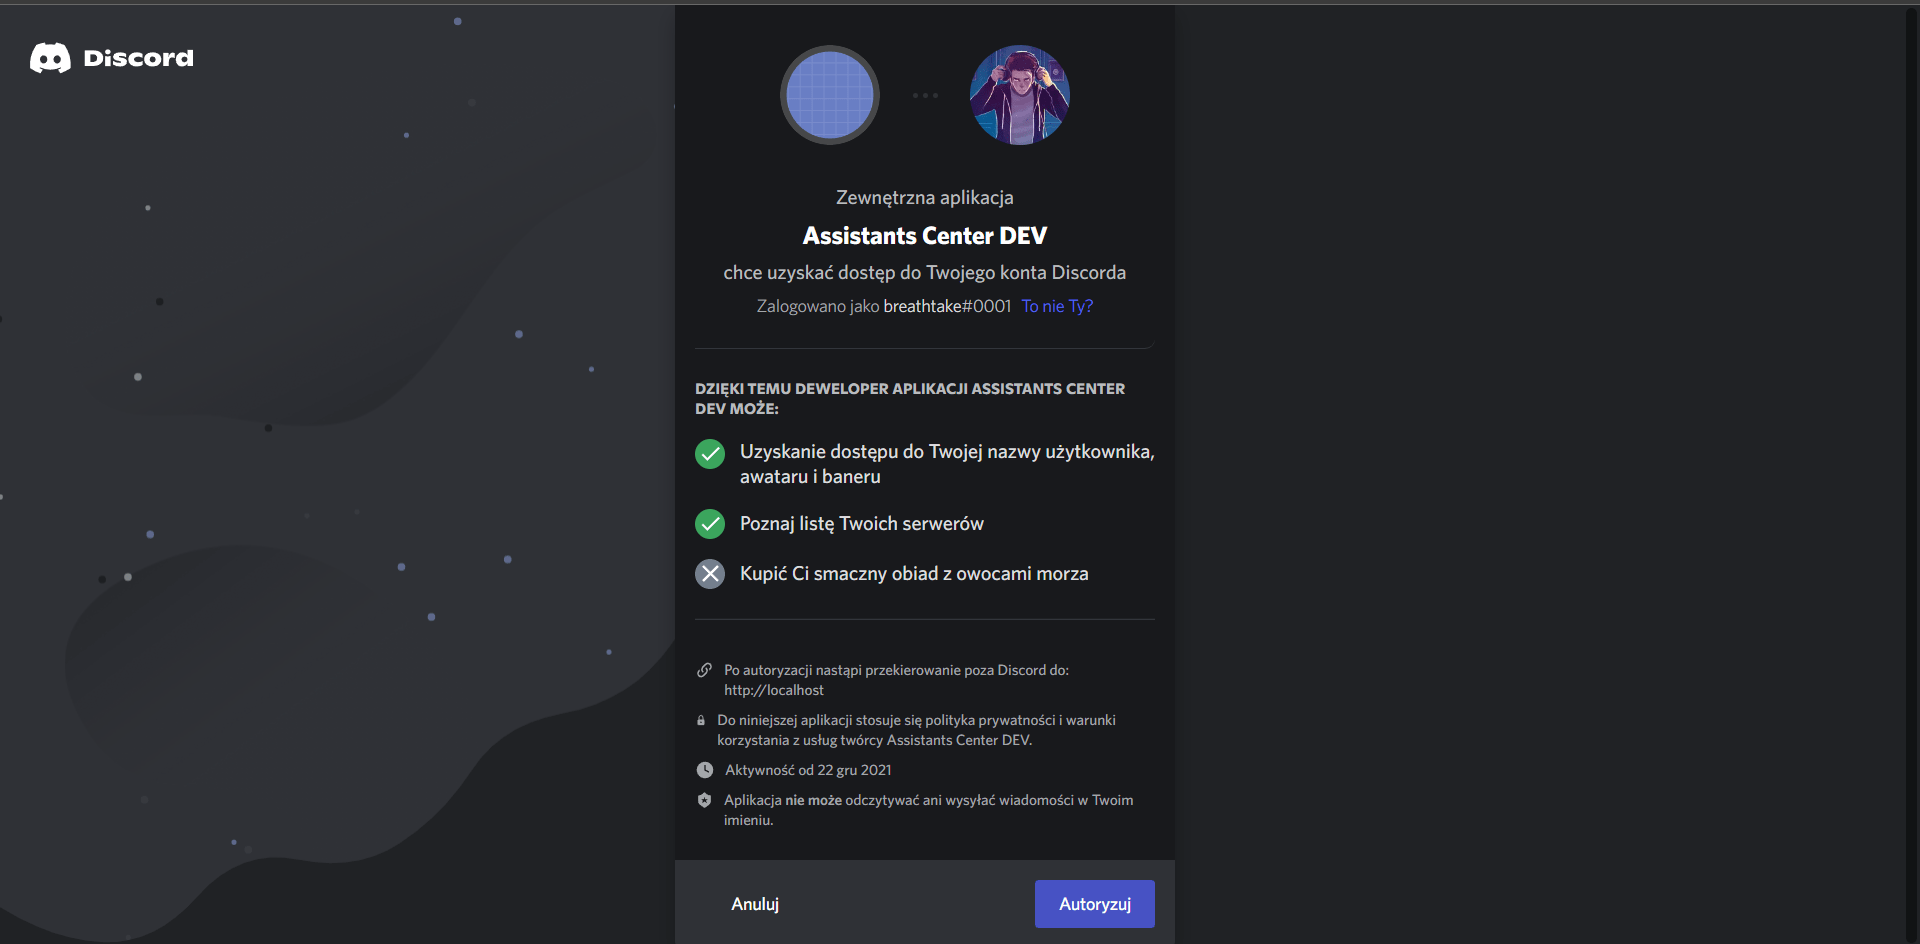
Ay, sweetie. This is the hardest part, because you have to understand what a Redirect URI is and how to get all the rest.
Redirect URI is a URL to which a user is redirected after successful authentication. For security reasons, you must add this URL to the whitelist on the Discord Developer Portal.
For discord-dashboard, this is [http or https]://[domain.com or localhost]/discord/callback
For example, for our project (hosted on localhost) this will be:
http://localhost/discord/callbackYou can learn more about how to hook a domain to a project in other parts of this tutorial.
Bot Token: How To Get A Discord Bot Token (Step-by-Step Guide) (writebots.com)
Client ID and Secret: How to Get Discord Client ID and Secret? – Heateor – Support Documents
Let’s write the code
First, create a config.json file and enter this code into it and populate its values:
{
    "discord": {
        "token": "discordToken",
        "client": {
            "id": "clientId",
            "secret": "clientSecret"
        }
    },
    "dbd": {
        "port": 80,
        "domain": "http://localhost",
        "redirectUri": "/discord/callback",
        "license": "dbdLicense",
        "ownerIDs": ["Dashboard Admin Discord User IDs"]
    }
}
Now, paste the code we prepared into the index.js file:
// Define Packages
const { Client, GatewayIntentBits } = require('discord.js');
const SoftUI = require('dbd-soft-ui');
const config = require('./config.json');
let DBD = require('discord-dashboard');

const client = new Client({ intents: [GatewayIntentBits.Guilds] });
client.login(config.discord.token);

const Handler = new DBD.Handler(
    /*
            Keyv storage instance
            Example: { store: new KeyvMongo('mongodb://user:pass@localhost:27017/dbname') }

            Can be left empty to use the default storage (Keyv with SQLite)
        */
);

(async ()=>{
    await DBD.useLicense(config.dbd.license);
    DBD.Dashboard = DBD.UpdatedClass();

    const Dashboard = new DBD.Dashboard({
        port: config.dbd.port,
        client: config.discord.client,
        redirectUri: `${config.dbd.domain}${config.dbd.redirectUri}`,
        domain: config.dbd.domain,
        ownerIDs: config.dbd.ownerIDs,
        useThemeMaintenance: true,
        useTheme404: true,
        bot: client,
        theme: SoftUI({
            storage: Handler,
            customThemeOptions: {
                index: async ({ req, res, config }) => {
                    return {
                        values: [],
                        graph: {},
                        cards: [],
                    }
                },
            },
            websiteName: "Assistants",
            colorScheme: "pink",
            supporteMail: "[email protected]",
            icons: {
                favicon: 'https://assistantscenter.com/wp-content/uploads/2021/11/cropped-cropped-logov6.png',
                noGuildIcon: "https://pnggrid.com/wp-content/uploads/2021/05/Discord-Logo-Circle-1024x1024.png",
                sidebar: {
                    darkUrl: 'https://assistantscenter.com/img/logo.png',
                    lightUrl: 'https://assistanscenter.com/img/logo.png',
                    hideName: true,
                    borderRadius: false,
                    alignCenter: true
                },
            },
            index: {
                graph: {
                    enabled: true,
                    lineGraph: false,
                    title: 'Memory Usage',
                    tag: 'Memory (MB)',
                    max: 100
                },
            },
            sweetalert: {
                errors: {},
                success: {
                    login: "Successfully logged in.",
                }
            },
            preloader: {
                image: "/img/soft-ui.webp",
                spinner: false,
                text: "Page is loading",
            },
            admin: {
                pterodactyl: {
                    enabled: false,
                    apiKey: "apiKey",
                    panelLink: "https://panel.website.com",
                    serverUUIDs: []
                }
            },
            commands: [],
        }),
        settings: []
    });
    Dashboard.init();
})();
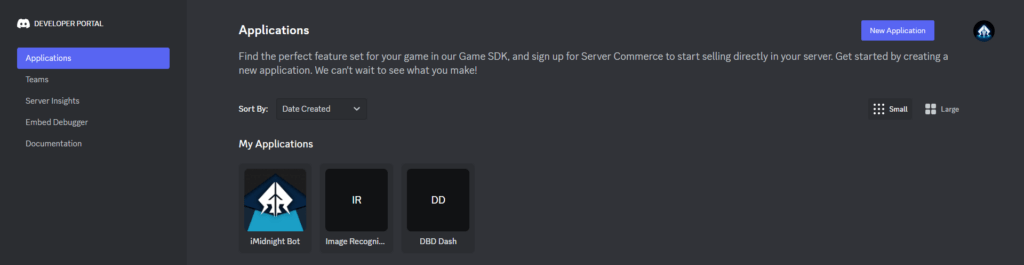
Head to: https://discord.com/developers/applications and select the application used for your bot.
Head to OAuth2 and find your list of redirects, you must add http(s)://(domain)/discord/callback as shown below. Ensure you have saved it before exiting out of the page!
Okay, back to your terminal, we can now start the dashboard by typing:
node index.jsAccept the Privacy Policy.
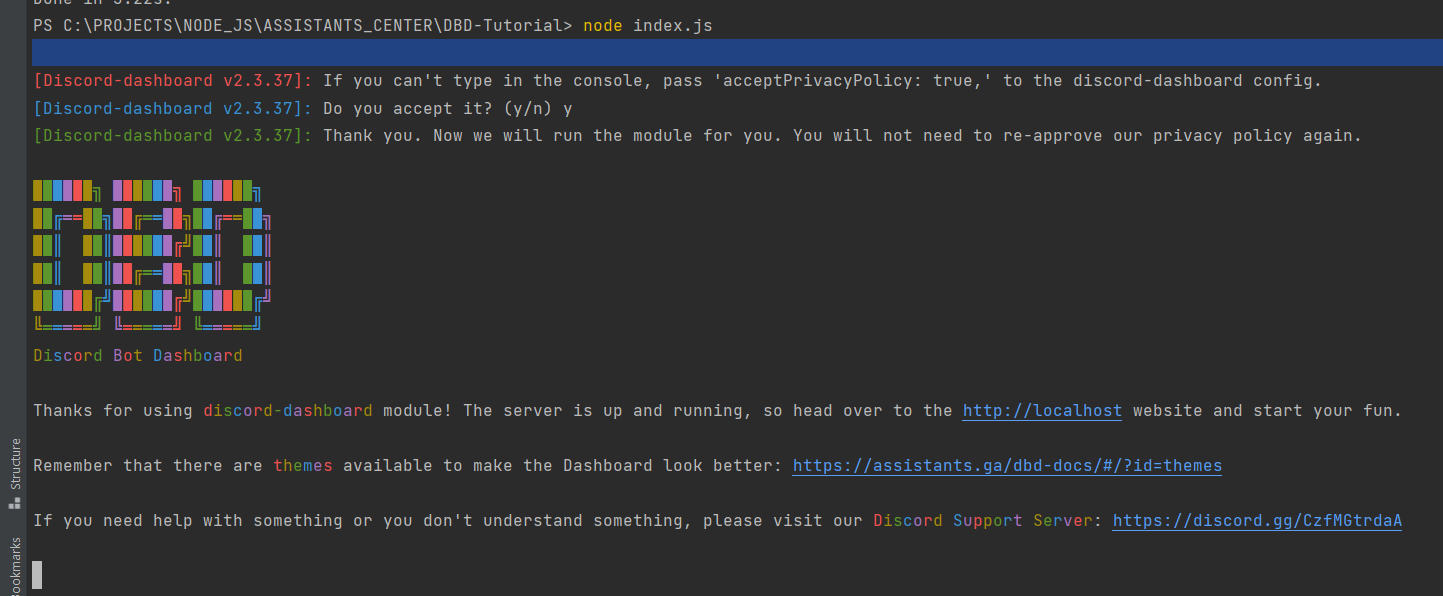
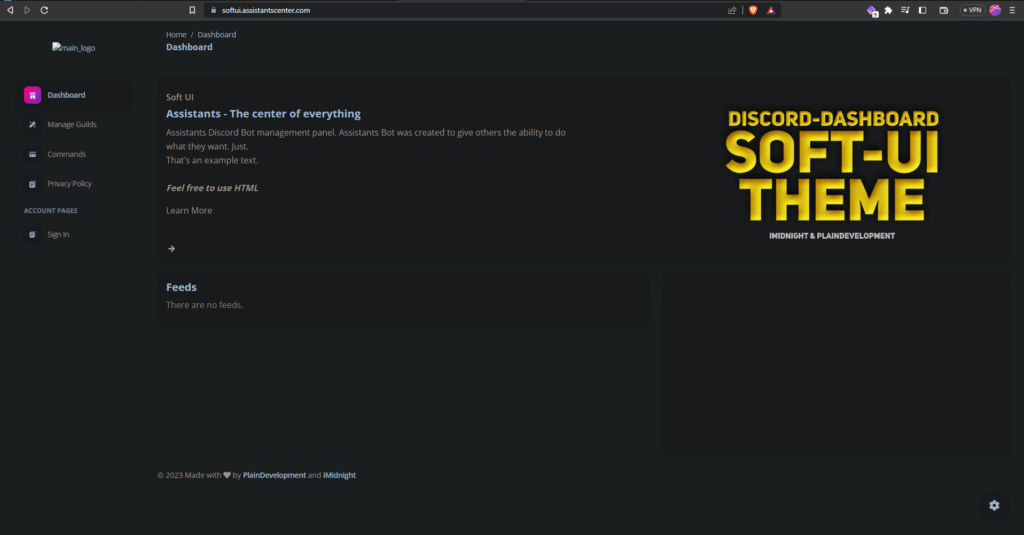
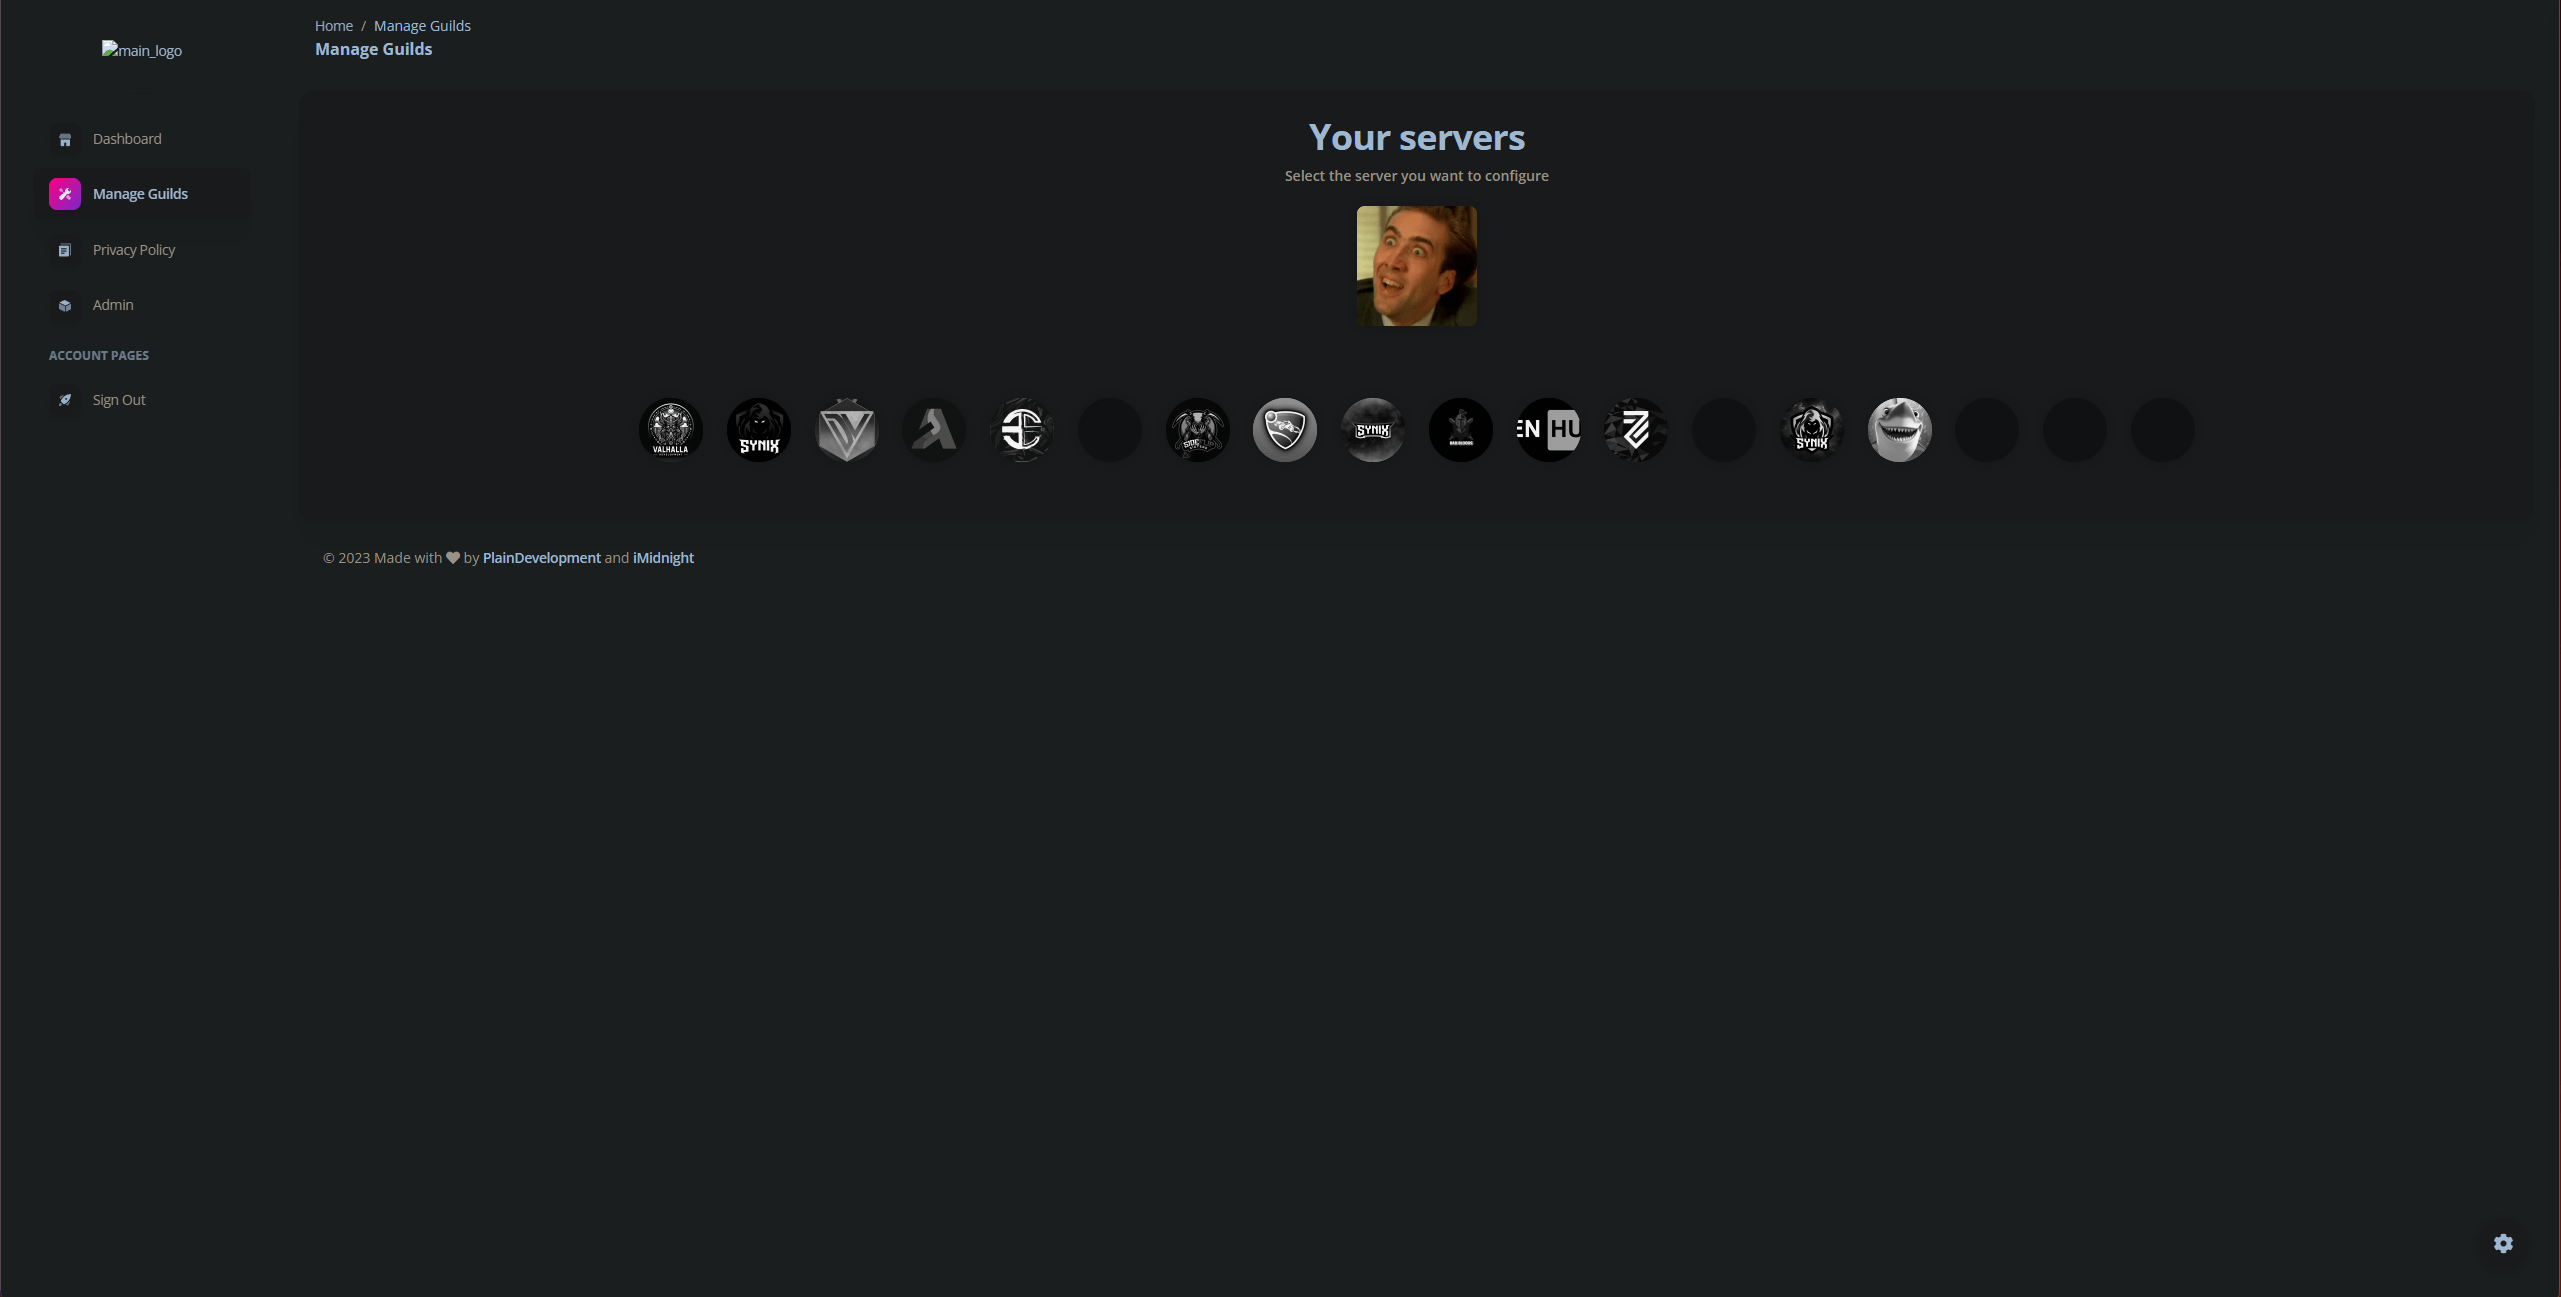
Head over http://localhost website.
AND… BOOM! WE GOT IT!
That’s it for this part of the tutorial, we invite you to the next parts, where you will create your own theme config and we will explain you how the dashboard basically works.
Have you encountered a problem or something has overwhelmed you? Join our Discord Support Server and we’ll be happy to help you.